Grade Level
3, 4, 5, 6, 7, 8, 9, 10, 11, and 12
Difficulty
Easy
Duration
1 hour
Subjects
Art
Craft
English
Family & Consumer Science
History
Reading
Summer Camp
-
Students critically curate a variety of resources using digital tools to construct knowledge, produce creative artifacts and make meaningful learning experiences for themselves and others.
-
Students communicate clearly and express themselves creatively for a variety of purposes using the platforms, tools, styles, formats and digital media appropriate to their goals.
-
– Asking Questions and Defining Problems
– Developing and Using Models
– Planning and Carrying Out Investigations
– Analyzing and Interpreting Data
– Using Mathematics and Computational Thinking
– Constructing Explanations and Designing Solutions
– Engaging in Argument from Evidence
– Obtaining, Evaluating, and Communicating Information
Vocab
Landmark
Historical
Community
Author
Glowforge
Licensing
Lesson for Download
Overview
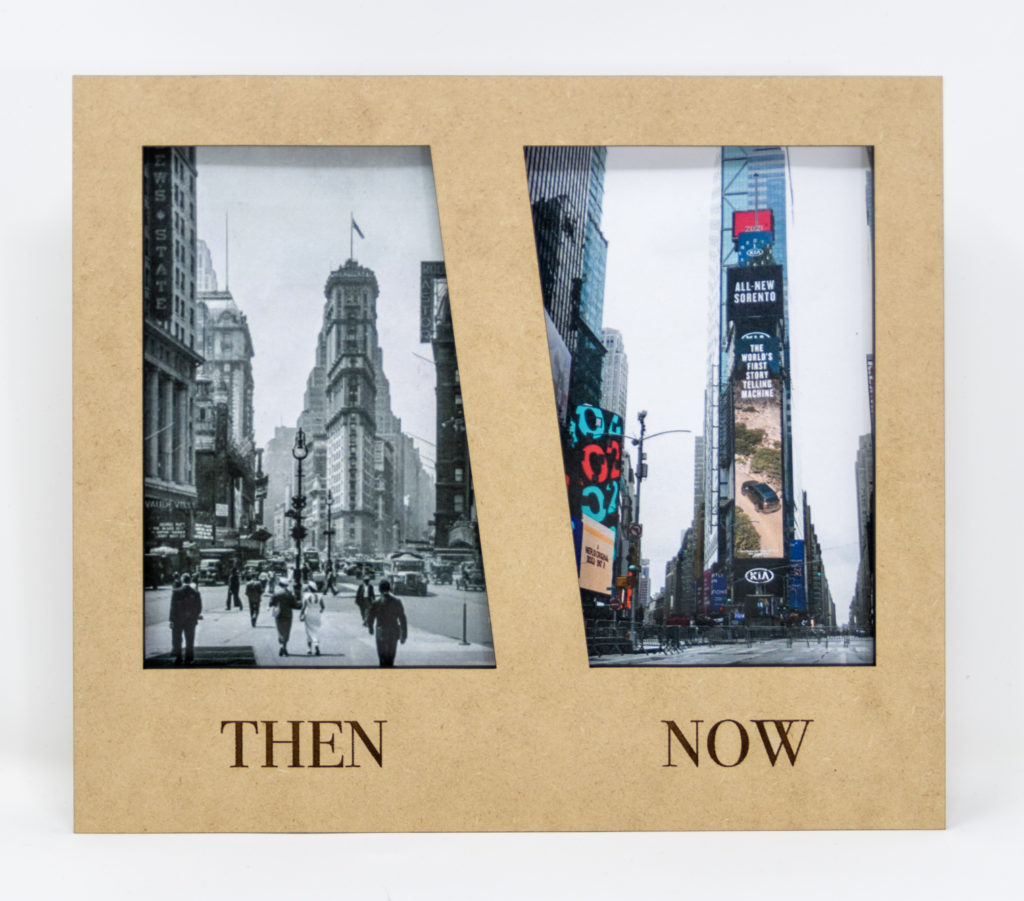
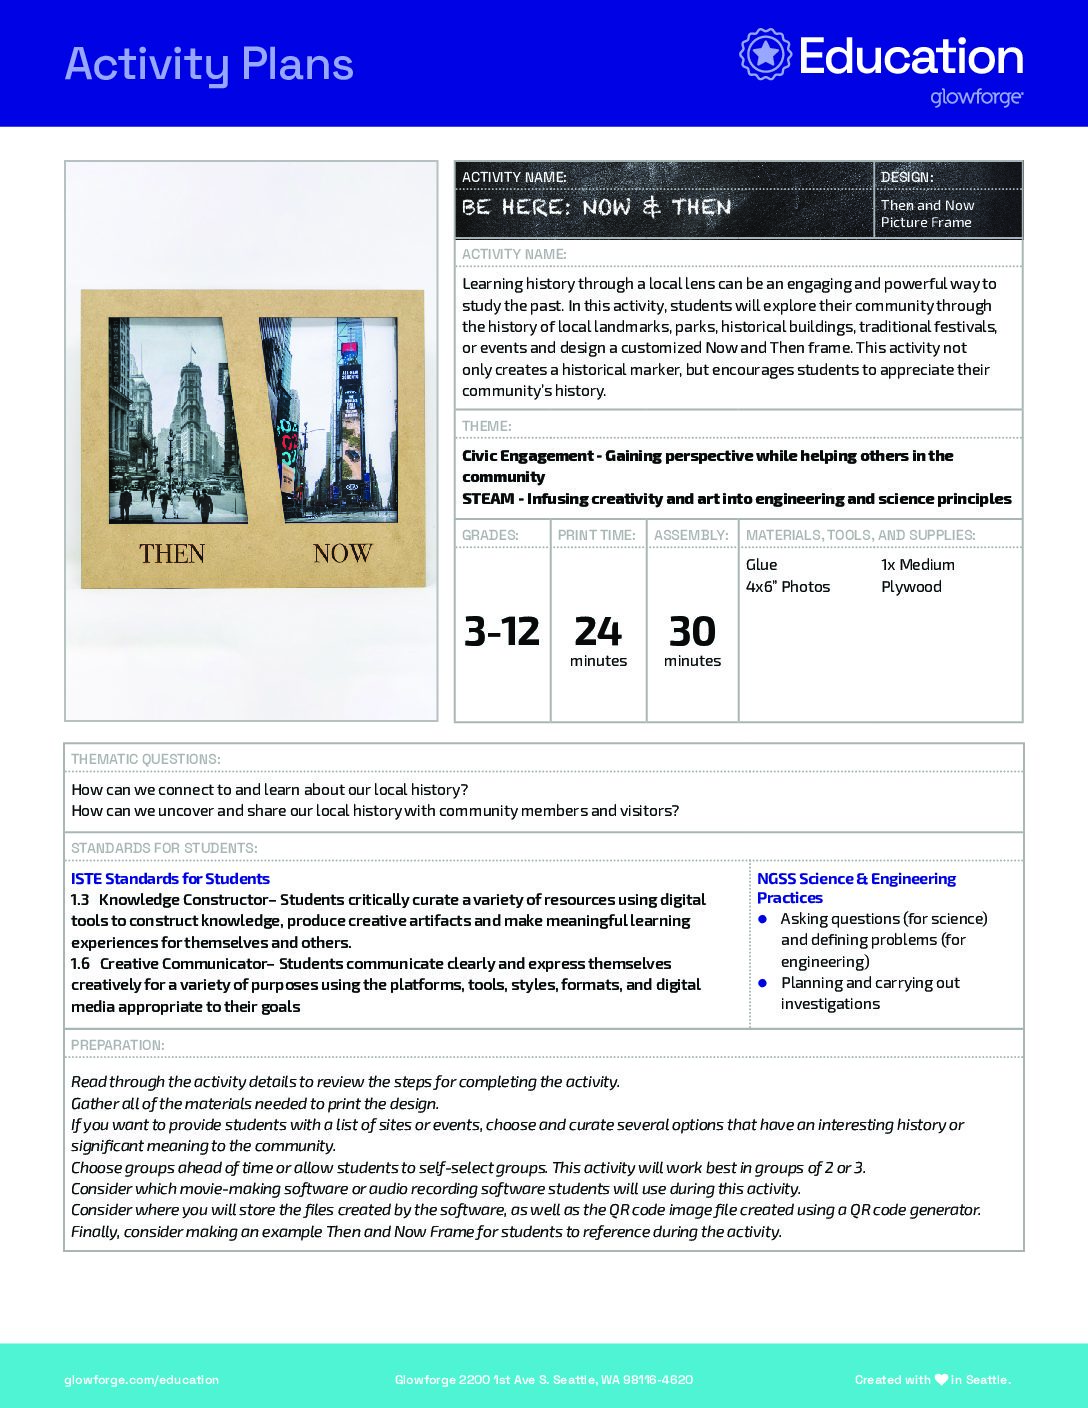
Learning history through a local lens can be an engaging and powerful way to study the past. In this activity, students will explore their community through the history of local landmarks, parks, historical buildings, traditional festivals, or events and design a customized Now and Then frame. This activity not only creates a historical marker, but encourages students to appreciate their community’s history.
Objective
Students will…Thematic Questions:
Outcomes:
Standards:
ISTE Standards for Students
NGSS Science & Engineering Practices
Supplies
- 1x Medium Plywood
- Glue
- 4×6” Photos
Catalog Designs
Description
Lesson Outline:
Get Ready:
- Read through the activity details to review the steps for completing the activity.
- Gather all of the materials needed to print the design.
- If you want to provide students with a list of sites or events, choose and curate several options that have an interesting history or significant meaning to the community.
- Choose groups ahead of time or allow students to self-select groups. This activity will work best in groups of 2 or 3.
- Consider which movie-making software or audio recording software students will use during this activity.
- Consider where you will store the files created by the software, as well as the QR code image file created using a QR code generator.
- Finally, consider making an example Then and Now Frame for students to reference during the activity.
Production Time:
Print – 24 minutes Assemble – 30 minutes
Rubric:
Use this optional rubric for student self-reflection or formative feedback throughout the Be Here: Now and Then experience. 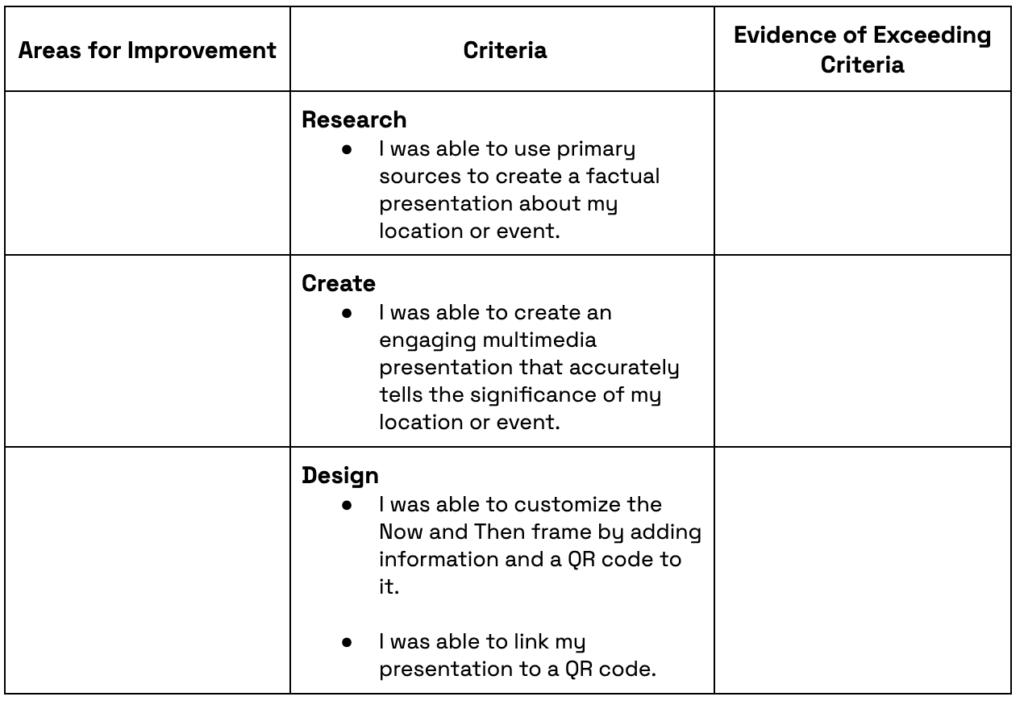
Lesson Instructions
Section 1 – Plan:
- Ask: “What do you know about the history of our community?” and “Have you noticed any new changes to our community?” There may be new developments like changes to stores, parks, houses, neighborhoods, or even traffic patterns.
- Ask students how they feel about these changes, or if they notice these changes imacting their community. Introduce students to the activity, showing them a sample Then and Now Frame, if available.
- Have students select a few sites or events from the provided list or have them create their own. Ask students to do some preliminary research to ensure there are available resources about their topic choices. Encourage students to use primary sources, oral histories (interviewing family members is a great way to do this), and find comparison images. Ask students to consider:
- What makes this site or event unique or significant historically?
- How has the site or event evolved through the years?
- How did it change or influence the community, then and now?
- Have students select one site or event based on their preliminary findings. Groups should collect information about their selection, organize their findings, and create a script for either a short video documentary or podcast presentation. Find tips from Read Write Think for creating video projects and podcast projects.
- After completing their scripts, groups should peer edit each other’s writing. Try a simple protocol like Highlighter Revisions to liven up word choice and fluency. Give students three different color highlighters and a key to use one color to focus on each area of revision, for example:
- Color #1 – Highlight the first word of each sentence.
- Is there variety?
- Does the writer use transitional words?
- Color #2 – Highlight each adjective.
- Is the writing descriptive?
- Are the adjectives strong and specific?
- Color #3 – Highlight each verb.
- Are there too many “to be” verbs?
- Are the verbs strong, descriptive action verbs?
- Color #1 – Highlight the first word of each sentence.
Peers offer suggestions for better word choice or stronger fluency based on this review. The colors help the peer editor focus on the work and make the writing stronger by showing the writer patterns in their writing.
- After groups finalize their scripts, they should record, edit, and publish their video documentary or podcast presentation.
- If groups are creating a video documentary, they will need to use video editing software. Documentaries should include images as well as audio.
- If groups are creating a podcast, they will need to use audio editing software. Podcasts should include spoken audio and sound effects.
- Generate a QR code that links to the presentation using a QR code generator tool, like QR Code Generator. Download and save the QR code as an image file.
- Students should find and print out two 4” x 6” images of their site or event: one historical and one from the present day. Photos should not be copyrighted. Instead, direct students to local archives, historical societies, or primary sources to obtain the right to print the image.

Section 2 – Customize and Create:
Have students…
- Open the design file in the Glowforge app.
- Select the Plus button to add text to the print. Examples of text might include:
- Before/After, Yesterday/Today, Past/Present,
- The site’s or event’s name
- The date of the images
- A brief caption near the QR code that reads, “Scan me with a phone or tablet to learn more!”
- Students can also decorate the frame with the Add Artwork option, selecting symbolic icons representing the location or event.
- Use the Plus button to upload the QR code image they created. This image should be at least 1.5” tall and engraved on the frame.
- Be sure to test print Part 1 of the print design to ensure the QR code works and there are no typos in the text. When creating prototypes prior to doing final prints, use cardboard for test prints. Just remember that if their design uses joinery such as slots or finger joints, these may need to be adjusted to suit their prototyping materials.
- Print the frames on the plywood material and use the directions in the Glowforge app to assemble its pieces.
- Add the historical and present day images to the frame.
Section 3 – Use:
- Design a poster explaining the project and simple directions on how to access the QR codes.
- Display student frames for the community to engage with. Encourage people to scan the QR code with a phone or tablet and watch or listen to students’ presentations.
Reflection Questions:
Help students consider…
- What were some of the most interesting discoveries you made while working on this project? What is something you thought you knew but discovered more about through this project?
- Did your project reveal anything about other community members’ points of view? Were you able to include a marginalized voice in your presentation? Did it change how you initially thought about the site or event?
- What did you learn about yourself as a community member as you worked on this project?
Pro Tips:
- Connect with the local historical society or a historian to provide images, primary sources, and context for the project. They may also wish to display student work at their location.
- Have students consider perspectives in the community outside of their own. For example, this research could uncover conflicting histories or views of progress. Have students include these various points of view in their presentations.
- Use a clear and simple QR code, as images or more detailed QR codes may be harder to scan.
Reimagine:
- How could we recognize and honor school retirees’ contributions to our school community? Have students interview school employees before they retire. Have an image of the honoree when they started in the district and a current photo. Add dates and captions around the images. Have students record messages from staff members and students (former and present). Link the audio messages to a QR code engraved on the frame.
- How could we celebrate the journey of our graduating class? Have younger students create frames for this year’s graduates. Include an image from kindergarten and the current year. Personalize it with names, dates they began school, and their graduating year. Customize the design with school mascots, class slogans, or a quote. Students could also add additional interviews, memories, or a class slide show via a QR code.
- How could we record the oral histories of community members? Create Now and Then frames that highlight long-time members of the community and their memories of how the community has changed throughout the years.
Remix:
Have students…
- Use images to represent areas of the school building or classroom and create visual representations for English Language Learners. One image could be of the activity that happens in that area of the classroom and the second image could be the supplies needed for that activity. For example, the cafeteria could have an image of students eating lunch at tables and the second image could be of a lunch box or lunch card. Or the gym could have an image of students participating in a game and the second image could be of shorts and sneakers. Customize the frame with the name of the area or class.
- Use a more durable Proofgrade material and add a stake to the frames. Create a walking audio tour of the school grounds, parks, or local areas using the frames to identify important locations, activities, or native plants and trees. Include information about the areas and what community members can do to support them, like keeping them clean or encouraging people to respect native plants and animals.
Meet Glowforge
The magical 3D laser printer that made this lesson possible. Learn more!
