Grade Level
3, 4, 5, 6, 7, 8, 9, 10, 11, and 12
Difficulty
Intermediate
Duration
Subjects
Engineering
Entrepreneurship
Fun
Game Design
STEAM
Summer Camp
-
Students critically curate a variety of resources using digital tools to construct knowledge, produce creative artifacts and make meaningful learning experiences for themselves and others.
-
Students use a variety of technologies within a design process to identify and solve problems by creating new, useful or imaginative solutions.
-
– Asking Questions and Defining Problems
– Developing and Using Models
– Planning and Carrying Out Investigations
– Analyzing and Interpreting Data
– Using Mathematics and Computational Thinking
– Constructing Explanations and Designing Solutions
– Engaging in Argument from Evidence
– Obtaining, Evaluating, and Communicating Information
Vocab
Game Design
Prototype
Role Playing game (RPG)
Trivia and knowledge game
Linear game
Logic puzzle
Strategic game
Author
Glowforge
Licensing
Lesson for Download
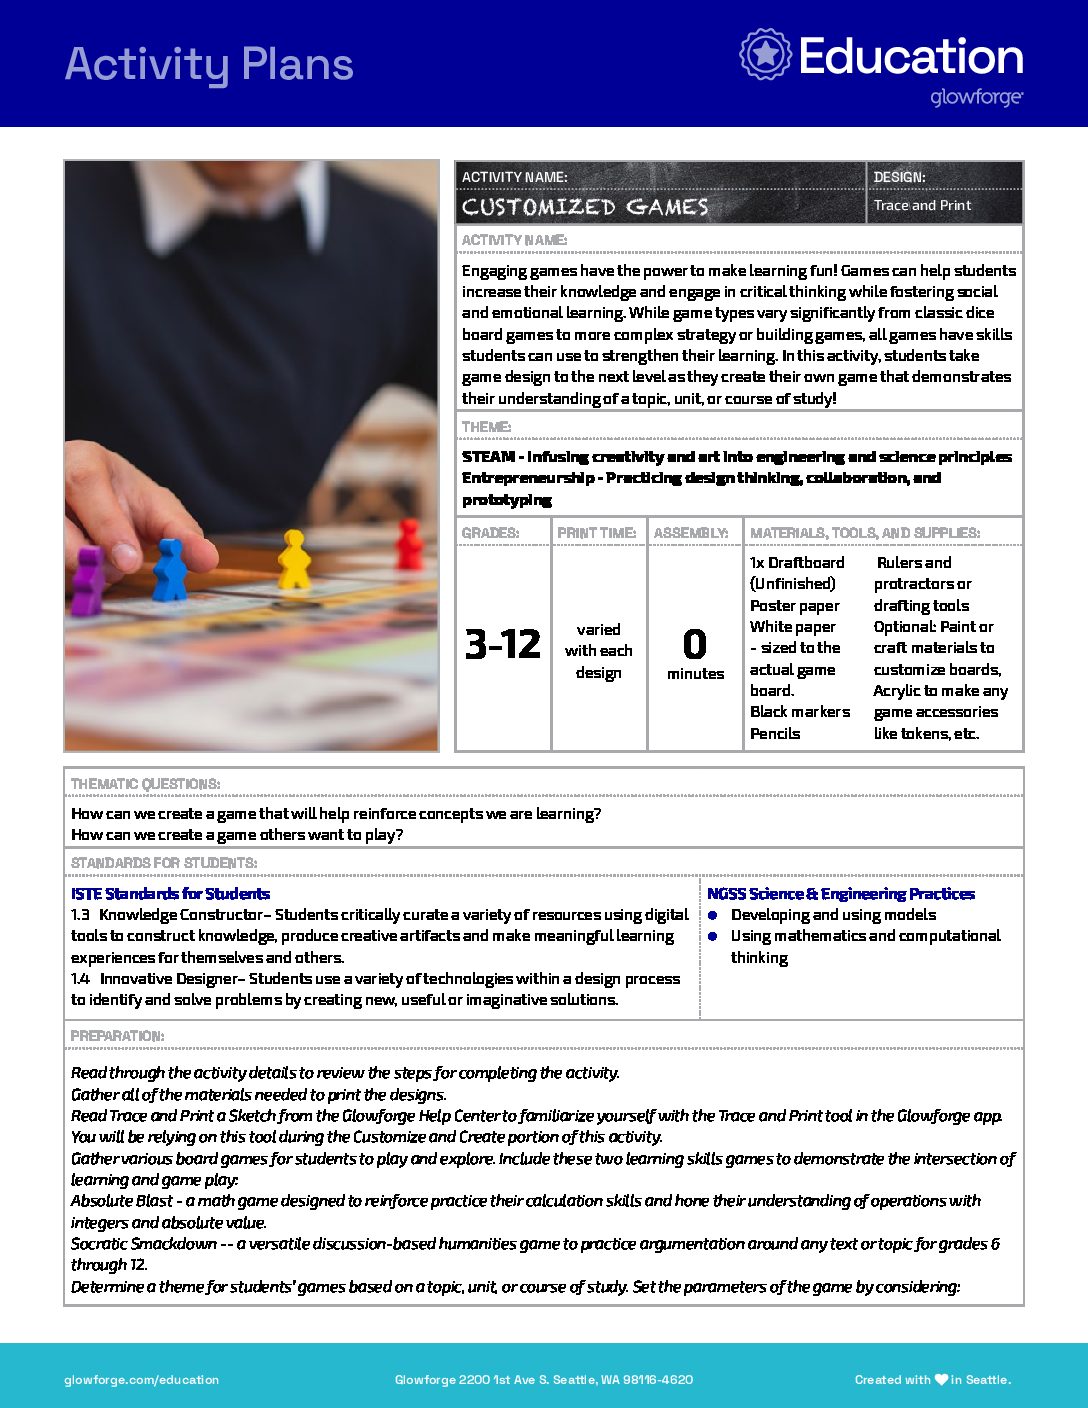
Overview
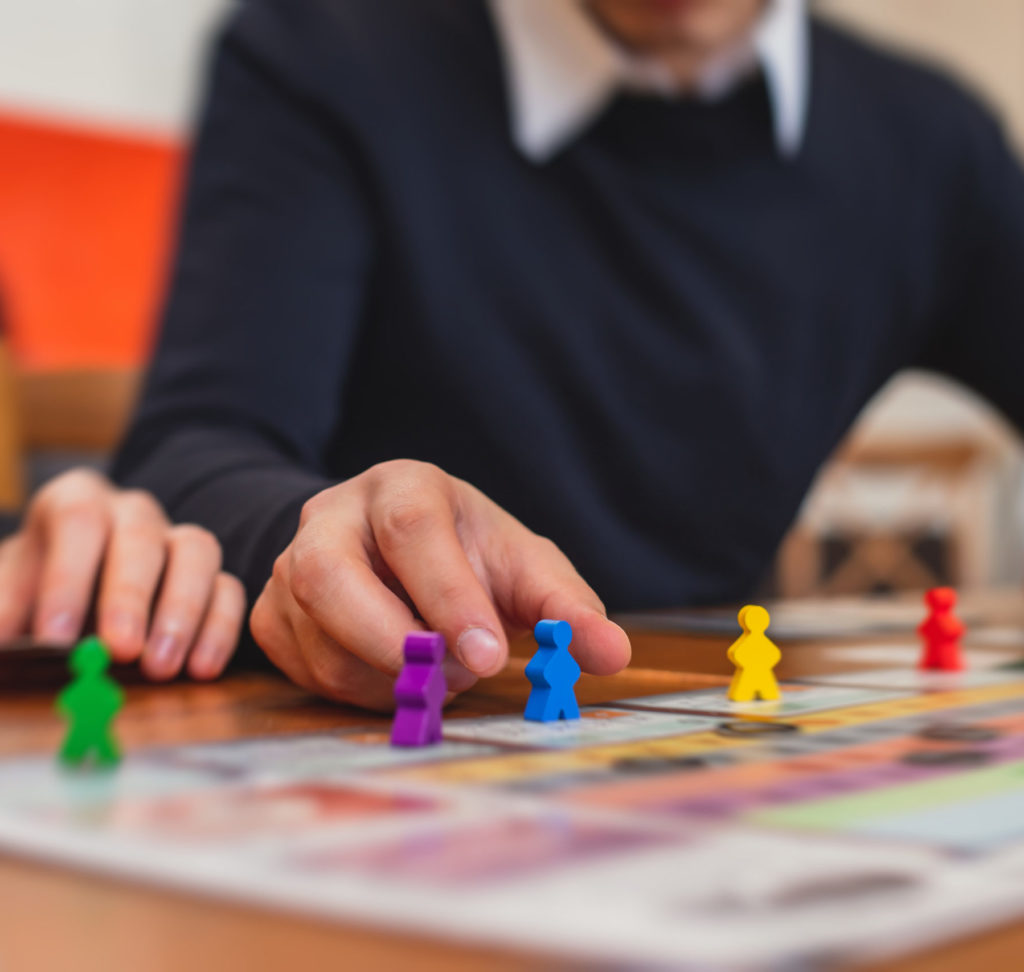
Engaging games have the power to make learning fun! Games can help students increase their knowledge and engage in critical thinking while fostering social and emotional learning. While game types vary significantly from classic dice board games to more complex strategy or building games, all games have skills students can use to strengthen their learning. In this activity, students take game design to the next level as they create their own game that demonstrates their understanding of a topic, unit, or course of study!
Objective
Students will…Thematic Questions:
Outcomes:
Standards:
ISTE Standards for Students
NGSS Science & Engineering Practices
Supplies
- 1x Draftboard (Unfinished)
- Poster paper
- White paper – sized to the actual game board. The largest size game board the Glowforge can accommodate is 12” x 20” but consider other sizes like 12” x 10”, 6” x 20”, or 6” x 10” to print multiple boards from one piece of material
- Black markers
- Pencils
- Rulers and protractors or drafting tools
- Optional: Paint or craft materials to customize game boards
- Optional: Acrylic to make any game accessories like tokens, etc.
Catalog Designs
For this activity, you will use the Trace and Print Tool to turn your idea into a design!
Description
Lesson Outline:
Get Ready:
- Read through the activity details to review the steps for completing the activity.
- Gather all of the materials needed to print the designs.
- Read Trace and Print a Sketch from the Glowforge Help Center to familiarize yourself with the Trace and Print tool in the Glowforge app. You will be relying on this tool during the Customize and Create portion of this activity.
- Gather various board games for students to play and explore. Include these two learning skills games to demonstrate the intersection of learning and game play:
- Absolute Blast – a math game designed to reinforce practice their calculation skills and hone their understanding of operations with integers and absolute value.
- Socratic Smackdown — a versatile discussion-based humanities game to practice argumentation around any text or topic for grades 6 through 12.
- Determine a theme for students’ games based on a topic, unit, or course of study. Set the parameters of the game by considering:
- Will it create an introduction to new or upcoming material?
- Will it provide a practice space for skill-building?
- Will it present opportunities for review?
- Do basic research about various games, their styles, and the skills they teach to help inform your planning for this activity or to support the students’ choices about the game style they will use. These resources can be shared with students.
- The Institute of Play: Excellent resources to teach you about game design. It includes the basics of design as well as worksheets for planning. Students could also reference these materials while building their game.
- Campbell University: Numerous resources on game design to get you started.
- Tabletop game publisher Stonemaier Games: Article on the 12 Tenets of Board Game Design.
- Explore game styles, the skills they support, and some well known examples of each type of game.
-
- Role-playing games (RPGs) help students make in-the-moment decisions and see different perspectives. (Dungeons and Dragons, Pathfinder)
- Trivia and knowledge games increase confidence. (Trivial Pursuit, Scrabble, Yatzhee)
- Linear games and logic puzzles support sequencing and understanding probability. (Monopoly, Life, Sudoku)
- Racing Games are chance dependent (Chutes and Ladders, Candyland)
- Strategic games reinforce critical thinking and cause-and-effect relationships. (Settlers of Catan, Chess, Stratego, Risk)
Production Time:
Print – Time will vary with each design Assemble – 0 minutes
Rubric:
Use this optional rubric for student self-reflection or formative feedback throughout the Customized Games experience. 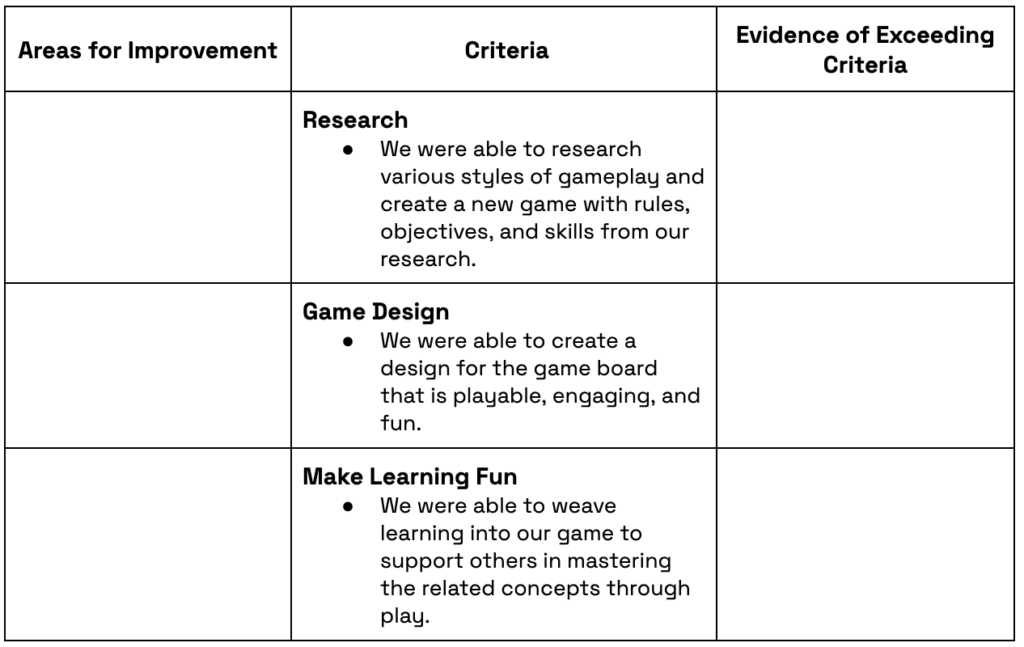
Lesson Instructions
Section 1 – Plan:
- Have students play a variety of board game types, such as RPG, trivia, linear, and strategy. Students can bring games from home or the school and local library, as well as game stores, may have games available to borrow.
- Encourage students to play a game they may not be familiar with to get exposure to different styles. As students explore the games, ask them to consider: “What makes a game engaging?”, “What games do you like to play and why?”, and “What makes a game boring or monotonous?”
- Have them consider the goals, rules, themes, number of players, how you win, and other essential details related to each game they play.
- Tell students they will be creating their own board games! Explain the parameters based on the predetermined theme. Encourage students to consider the games they played in class to inspire their creations.
- Have students work in small teams. They should decide the rules and properties of their game. Students should consider:
- Who is the audience for their game? What age? What ability level?
- What is the story behind the game? What makes a player want to play the game?
- What is the game’s objective? Do players try to get from point A to point B? Do they collect items? Do players answer questions and earn tokens? Do they find something or strategically take something?
- How many players does the game need? How are players represented on the board? Do players use pegs, icons, standees, or miniatures? How do they move? Do they follow the same path?
- How do the players interact during the game?
- What obstacles and bonuses will the game have? How many? Will they be represented on the game board itself, or will they be included as separate items like cards?
- What kind of board will the game use? What style is it? Is it based on a classic board game, or is it completely new? It doesn’t have to be a rectangle or square – it could be any shape!
- How will players navigate the game? Will they use dice, a spinner, cards, or a combination of these things?
- Have teams create drafts of their board game using poster paper and markers. Since these are drafts, game pieces, navigation, and structure do not have to be exact or finalized.
- Have students explore their classmates’ games. Teams should select a Game Master to stay with their game as the rest of the team does a gallery walk of the other teams’ games. The Game Master will help explain the game, provide the context of play and engage the visiting team in a round or two of play. The rest of the team will visit another team’s game, engage with their game master, and provide constructive feedback based on its design, layout, rules, and play. Remind students that feedback should, in some way, improve the game. Game Masters should also take note of any areas they notice needing revision. Provide paper or sticky notes to collect the feedback.
- Have teams reflect on the feedback and make adjustments to their game and game board based.
Section 2 – Customize and Create:
- Give each team a piece of white paper the same size as their game board. Remind students when using the Trace Tool to leave about an inch of white space around all edges of their drawing to ensure a clear transfer of their design.
- Have each team draw their board to scale using pencils, drafting tools or rulers for straight lines, and protractors for curves so that they create clean edges.
- Teams should check to ensure their game board drawing is exact, has no misspellings, and includes any decorative graphics drawn on the actual board, not in the white space around it.
- Once the game board is complete and proofed, have students trace over any pencil with a black marker.
- Bring the team’s design to the Glowforge and place it in the center of the print bed. In the Glowforge app, click the Plus button to Add Artwork. Select the Trace option to use the camera to capture and upload the design into the app.
- Make any necessary adjustments to placement or size in the app. Students can also use the Glowforge app’s “Add Artwork” or “Add Text” options to engrave words, icons, and designs to their game board.
- Print the game board on the desired material. When choosing materials, make sure to use materials that are laser compatible. You can learn more about what materials are compatible with Glowforge here.
- Have teams create the additional parts needed for their game. This might include player pieces, tokens, or any other objects needed to complete the game. Students can explore the Glowforge Design Catalog for designs such as dice, spinners, or other items to use as additional game pieces.
- Have teams test-play their games to make sure they have all of the needed pieces and details.
Section 3 – Use:
- When the game boards are printed, have a game day! Have students play each other’s games and discuss what they like about each game and what makes it fun to play.
- Consider having a tournament of games! Set up a tournament bracket with the game titles and have students vote on the best game until there is a final champion. This game could earn a place of honor in the library or classroom for others to play and enjoy!
Reflection Questions:
- How do you feel about the game you created with your team? What parts of it do you particularly like? What elements would you change? Why?
- What’s one thing you have seen in your classmates’ games that you would like to implement in your game design?
- What problems did your team encounter while working on your game? How did you solve them?
Pro Tips:
- Game boards come in many sizes and shapes. To save on materials, offer sizes that allow you to print 2-4 boards per piece of draftboard. Consider 2-12” x 10” or 2-6” x 20” or 4-6” x 10” game boards.
- Explore the Glowforge Design Catalog for designs such as dice, spinners, or other items to use as additional game pieces.
- Create and use a checklist to help focus students on game design’s many aspects and criteria.
- The trace tool allows you to create any shape. As an alternative to traditional square or rectangle boards, consider something elliptical or organic instead.
- To create GIANT board games, use the trace tool to create male and female puzzle-like connections so multiple boards can be joined together
Reimagine:
- How can you repurpose your game and game board to teach a different concept to someone in a lower grade than yours? What would you teach them? How would you ensure that the game is fun while they learn?
- How could you recreate a digital game (i.e. Minecraft, Fortnite, Smash Bros, Mario Kart, etc.) as a board game and adapt it to be just as engaging? What elements could you add to keep it exciting and fun to play?
Remix:
- Provide students with a blank game board and see how many game variations they can create using the single game board.
- How might we highlight different students’ skills? Create one class game but have the class break up the design process into different roles or jobs. Are there artistic members? Have them create the images to use the Glowforge app’s Trace tool to add them to the game board. Are there creative writers? Have them develop the backstory or clever cards to be used during gameplay. Are there students interested in 3D modeling? Have them design custom pieces and use the Glowforge app to print them. The possibilities are endless!
- Make the design more challenging by providing each team with randomized specific criteria. Use a spinner or pull criteria from a hat that forces teams to incorporate a specific concept or rule into their design. For example, teams can only have five rules, or play is limited to only three players, or they have to include two parts of the unit that don’t seem to directly connect.
Meet Glowforge
The magical 3D laser printer that made this lesson possible. Learn more!
