Grade Level
K, 1, 2, 3, 4, and 5
Difficulty
Easy
Duration
1 hour 15 minutes
Subjects
Art
Mathematics
Science
STEAM
-
Students leverage technology to take an active role in choosing, achieving, and demonstrating competency in their learning goals, informed by the learning sciences.
Vocab
Adaptation
Geometric Shapes
Author
Emily Hurst (Glowforge Education Ambassador)
Licensing
![]()
Overview
Ready for a trip to the zoo? In this activity, students use what they know about geometric shapes to create a library from which students will build an animal.
Objective
ISTE Standards for Students Thematic Questions:
Students will…
Standards:
Supplies
You will need these supplies for each project:
- Paper
- Cardboard, Acrylic, or Wood
- Markers or Paint
- Glue
- Optional: Any other art supplies
Description
Lesson Outline:
Get Ready:
- Read through the activity details to review the steps for completing the activity.
- Gather all of the materials needed to print.
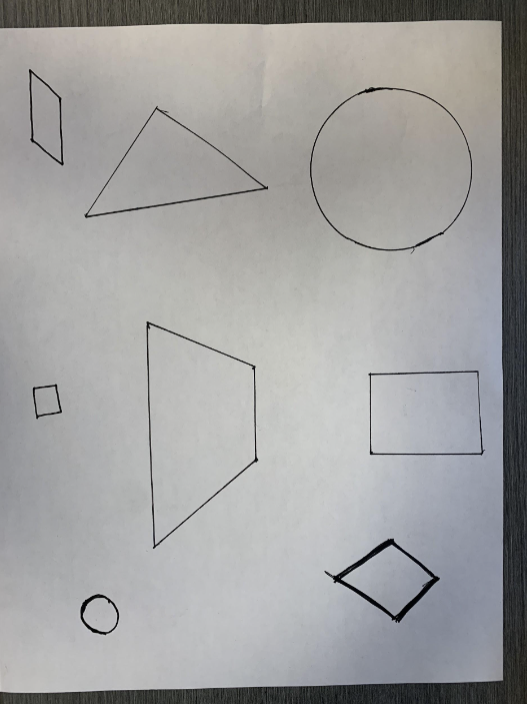
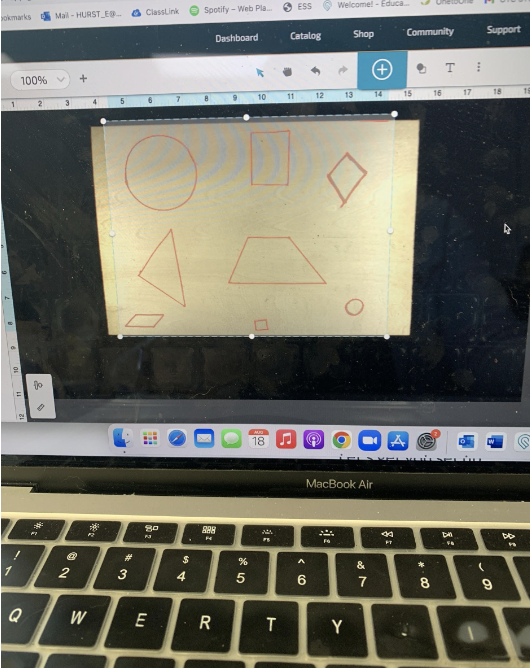
- Have students draw a variety of shapes on a sheet of paper.
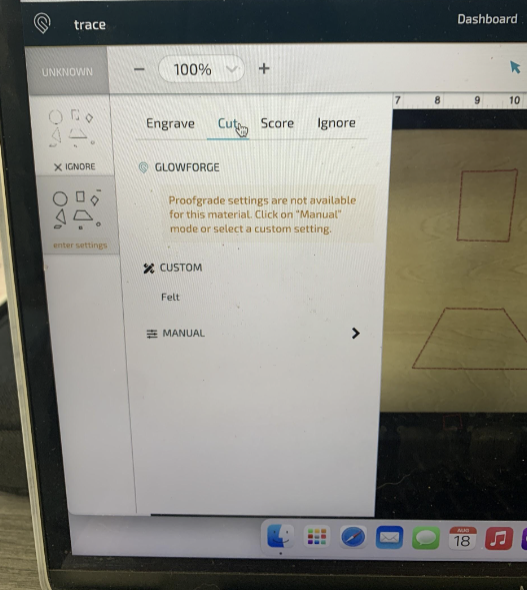
- Use the laser cutter to trace the shapes and cut them out of cardboard, acrylic, or wood.
- Allow students to glue their shapes together to create an animal.
- Afterwards, allow them to paint or color their animals.
- Be sure to have students defend design choices and to provide rationale for features they add or remove from their final designs.
Production Time:
Print – 10 minutes
Assemble – 45 minutes
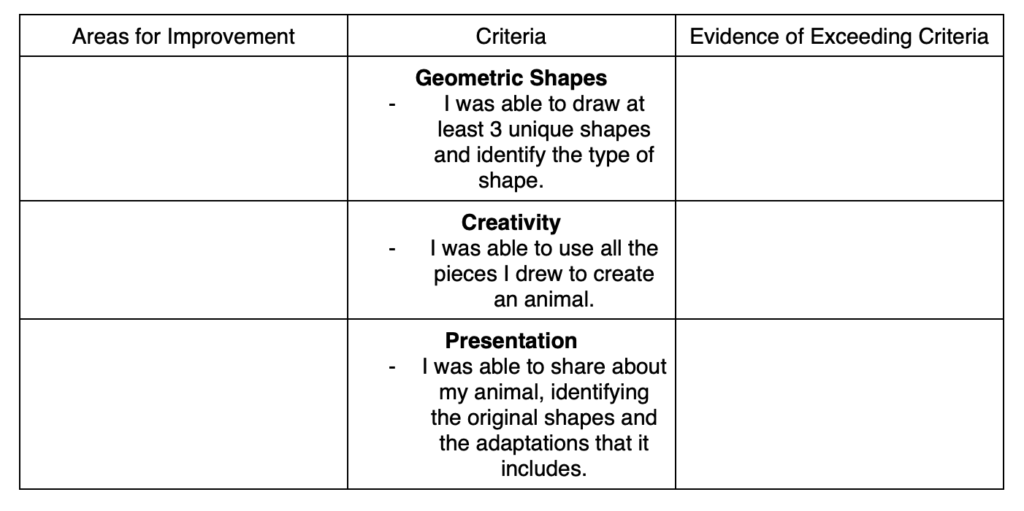
Rubric:
Use this optional rubric for student self-reflection or formative feedback throughout the Geometric Animals experience.
Lesson Instructions
Section 1 – Plan:
- Read a children’s book or short story that includes animal adaptations (such as What Do You Do With a Tail Like This?)
- As you read, ask students to keep track of the adaptations in the story. How do the animals survive?
- After reading the story, ask: “What different types of adaptations did you notice? What were they used for?”
- Note that adaptations are used to survive, they are not physical features of an animal that don’t help the animal survive.
- Record students’ answers about adaptations on a whiteboard or chart paper.
4. Have students reflect on what other types of adaptations exist. Older students can take the time to research using the internet. Younger students could read more books or use research tools.
5. Explain that students will imagine and design their own animal and use Glowforge to bring it to life!
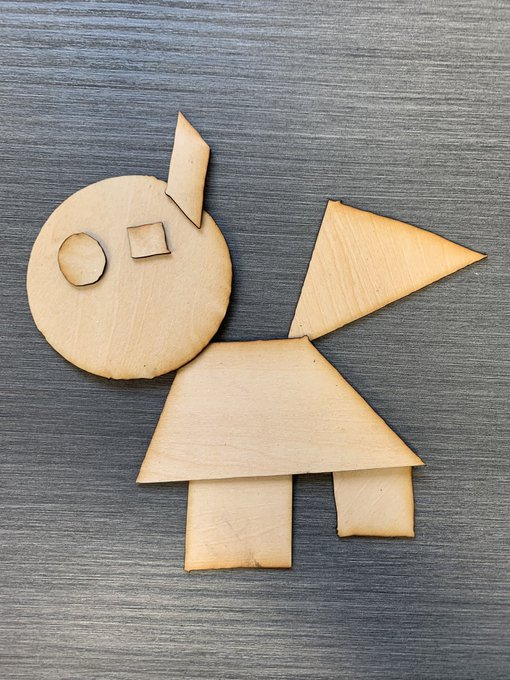
6. Have students draw a variety of shapes on a piece of paper. Don’t tell them that these shapes will be placed together to create an animal.
Section 2 – Customize and Create:
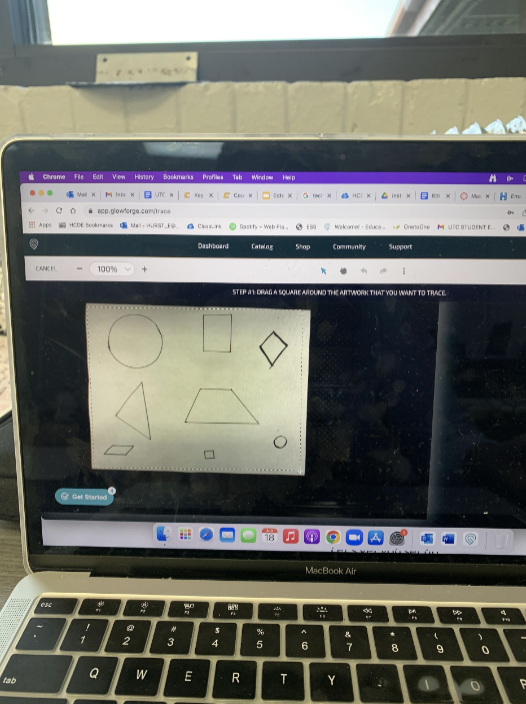
- Once the students have created their shapes, use the Glowforge to trace their shapes and cut them out of your preferred material (stronger than paper, preferably).

- Demonstrate to students how they can affix different features to one another.
- Have students use their shapes to create an animal. Have the students consider how they could represent adaptations in their animal (whether it be a tail, teeth, wings, etc.)
- Allow students to use paint, markers, and other materials to customize their animals.
Section 3 – Share:
- Once students have created their animals, allow them to record a video using Flip, or some similar app, to present their animal. Be sure to ask the students to share what shapes they see in their animals and what adaptations they chose to equip their animals with.
Reflection Questions:
Help students consider…
- What’s one thing you see in a classmates’ animal that you would like to incorporate into your own?
- What challenges did you have when creating your design? How did you solve them? How might you design differently in the future?
Pro Tips:
- Cardboard can be joined in a variety of creative ways! Inspire your students to get creative with their designs by exploring some of these options from Exploratorium Creative Connections.
- Colored cardboard, acrylic, and wood can be purchased and used with the Glowforge printer. This material can be combined with other options like paint and markers to give more creative options to their creation.
- Allow students the time to think creatively will be very important throughout this project. Students may need to create more than one animal.
- Watch for students who are unsure of how to construct a larger image from smaller pieces.
Reimagine:
- How can we write a story about our animal? Could we model our story after the book we read?
- How can we learn about other climates using our animals? Describe the climate that your animal would be able to survive in!
Remix:
Have students…
- Meet with younger students to share their animals. Work together with the younger student to name the animal and create a video using a green screen to place the animal in its most likely climate.
- Enhance a learning experience in math by having students graph their animals on a coordinate plane and then find the area of their animal! Because students are using geometric shapes, they should be able to do this work.
Meet Glowforge
The magical 3D laser printer that made this lesson possible. Learn more!
