Grade Level
2, 3, 4, and 5
Difficulty
Easy
Duration
1 hour 15 minutes
Subjects
Art
Craft
Design & technology
Fun
Science
STEAM
Summer Camp
-
Students critically curate a variety of resources using digital tools to construct knowledge, produce creative artifacts and make meaningful learning experiences for themselves and others.
-
– Asking Questions and Defining Problems
– Developing and Using Models
– Planning and Carrying Out Investigations
– Analyzing and Interpreting Data
– Using Mathematics and Computational Thinking
– Constructing Explanations and Designing Solutions
– Engaging in Argument from Evidence
– Obtaining, Evaluating, and Communicating Information
Vocab
Planet, Solar System, Illuminated, Scale Model
Author
Glowforge
Licensing
Lesson for Download
Lesson Handout
Overview
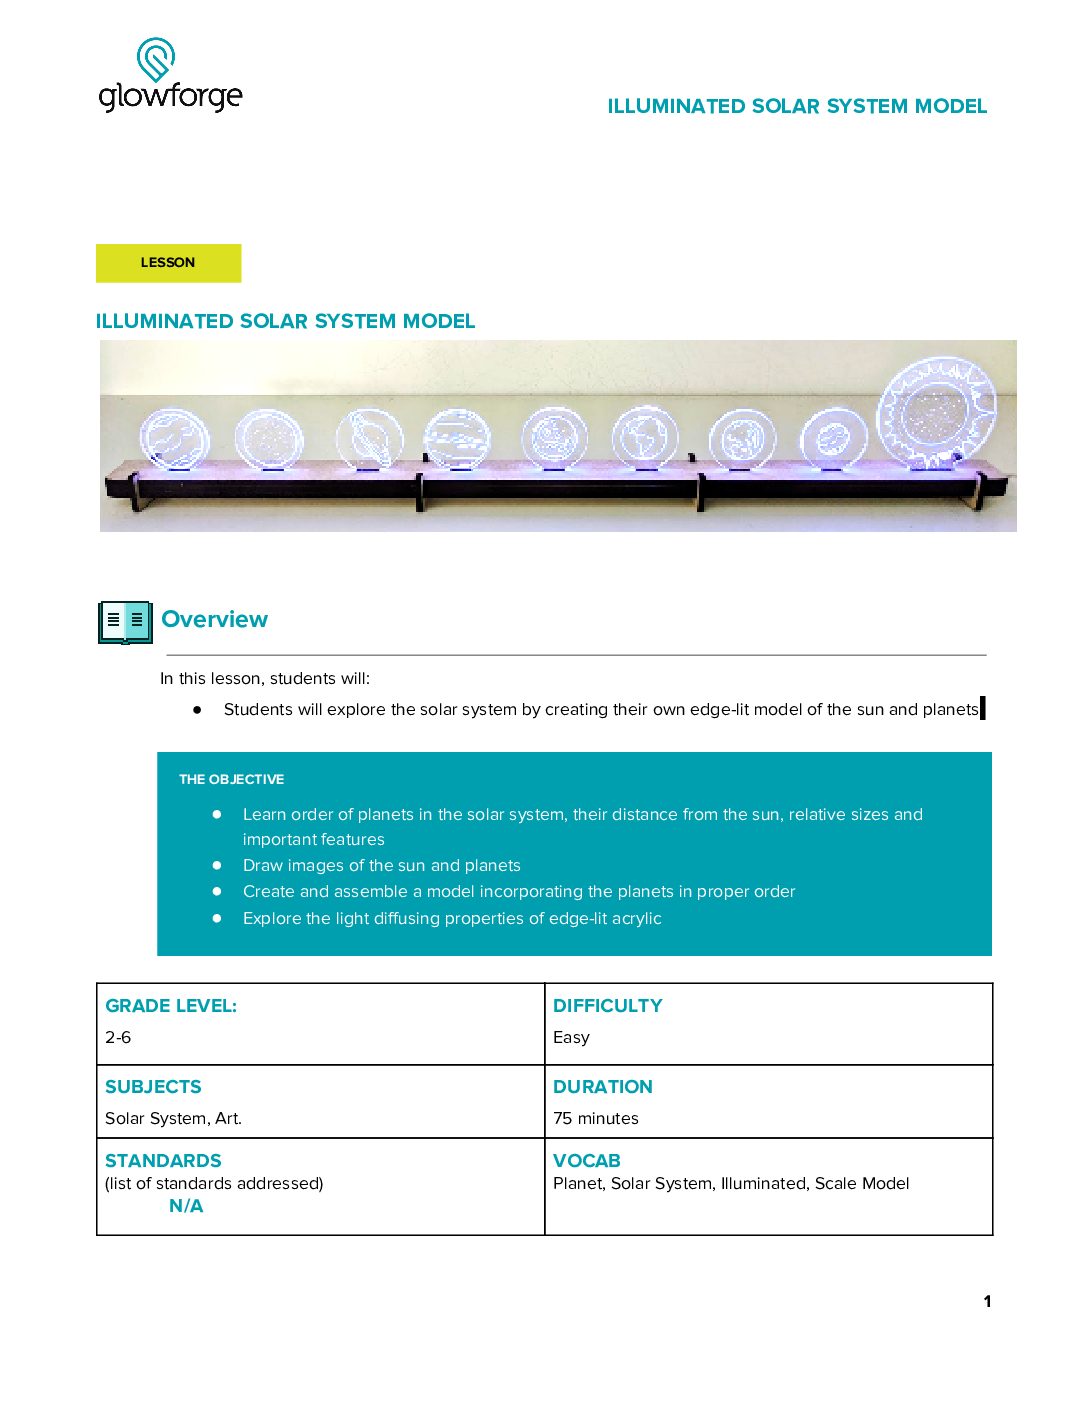
3…2…1….Blastoff! In this activity, students will explore space by building their own Illuminated Solar System using the Glowforge App’s Trace and Print tool.
Objective
Thematic Questions:
Standards:
ISTE Standards for Students
NGSS Science & Engineering Practices
Objectives:
Supplies
For each Illuminated Solar System you will need:
- 1 x Proofgrade Medium Clear Acrylic
- 1 x Proofgrade Medium Draftboard
- 1 meter Strand of fairy lights containing 20 LEDs
- Note: 2 meter strands of Fairy lights that have 20 LEDs will not work well in this project.
- Paper
- Black fine point Sharpie or other dark colored pen or pencil
Design Files


Description
Lesson Outline:
Get Ready:
- Read through the activity details to review the steps for completing the activity.
- Gather all of the materials needed to print, assemble, and customize the Illuminated Solar System.
- For this activity, you will use the Trace and Print Tool to turn an idea into a design. Review the linked resource to learn how to add your own artwork to the design.
- Prepare to design the Sun token as a demonstration for students about how to use the Trace and Print Tool.
Lesson Instructions
Section 1 – Create:
- Ask: “What do we know about our solar system?” Have students brainstorm independently and then share their ideas as a class. Record responses on a white board or chart paper.
- Divide students into 8 groups with 2-3 students per group. Each group will learn about one of the solar system’s planets and design a unique planet token based on what they learned. They’ll then use Glowforge to print their token and build their model Solar System.

- Tell students that before the class builds an Illuminated Solar System, they will explore and learn cool facts about their planet. Encourage students to use the NASA Science for Kids and Passport to Space resources to answer questions and design their planet’s token.
- Have students start at question ten and work towards question zero to help launch their knowledge of their planet and design their token. As students are drawing their planet token, remind them that their drawing should not be larger than one standard piece of paper so that it can fit in the Glowforge.
- Consider displaying all of the prompts at the same time or revealing one prompt at a time.
-
-
- 10. . . Write down one “I wonder” about your planet
- 9. . . What is your planet’s distance from the sun?
- 8. . . What is your planet’s order from the sun?
- 7. . . What is the average temperature on your planet?
- 6. . . How long is a year on your planet?
- 5. . . How long is a day on your planet?
- 4. . . How many moons does your planet have?
- 3. . . How much does 100 pounds of pizza weigh on your planet?
- 2. . . Who was your planet named after?
- 1. . . What is the answer to your “I Wonder?”
- Blastoff! Draw your planet on a blank piece of paper. Be sure to include the planet’s most recognizable features like rings or spots. Consider sketching the planet in pencil and then go over the design with a dark, black marker to assist with importing into the Glowforge App.
-
- When groups have finished answering the questions, assist them in using the Trace and Print Tool, including these specific steps:
- Import each group’s planet token into the Glowforge App as individual drawings. Place the paper containing the drawings of the sun or planet on the Glowforge print bed and open the Glowforge App.
- Click the Import Artwork button in the Glowforge App and select Trace to select the Glowforge Trace Tool. When importing each image with the Trace tool, scan the image but do not add cut lines.
- It is important to be able to position each image independently, so you must repeat the scan process once for each planet image. In each scan, be sure to crop the area to be scanned closely, so that it only contains the student drawing.
- After each image is scanned, place it anywhere convenient in the Glowforge App. It will need to be processed further before it is moved to its final position.
- Be sure that the print settings for the drawings are all set to Engrave.
- Once all the images are imported, remove the paper from the Glowforge, and place a sheet of Proofgrade Medium Clear Acrylic on the bed. Click the Import Artwork button and select Upload to import the SolarSystemPlanets.svg file. This file contains outlines for the eight planets and the sun.
- In the Glowforge App, select the Cut setting for the outlines.
- Drag the image of the sun into the largest of the cut outlines. Scale the image of the drawing down until it fits entirely inside the outline by clicking on the small circle at the image corner and dragging it towards the center. Move the image so that it is centered within the circular portion of the cut outline.
- Follow the same process to place the images of the eight planets inside the smaller cut outlines. Decide with the students whether they’d like the planet images to fill the full space of the outlines to make them more easily visible, or whether they’d like to scale down the size of some of the planet drawings to give an idea of their relative sizes. Both methods work great for the Illuminated Solar System. Once they’ve settled on the way they’d like their planets to look, scale the images appropriately and drag each into its own cut outline.
- Note: do not change the size of the cut outlines for the planet shapes.
- Before printing, double check that all of the uploaded images will print with the Engrave setting and outlines will print with the Cut setting.
- Once everything looks good, print the models of the planets and sun on the Proofgrade Acrylic. Then remove the models from the Glowforge and peel off all the masking.
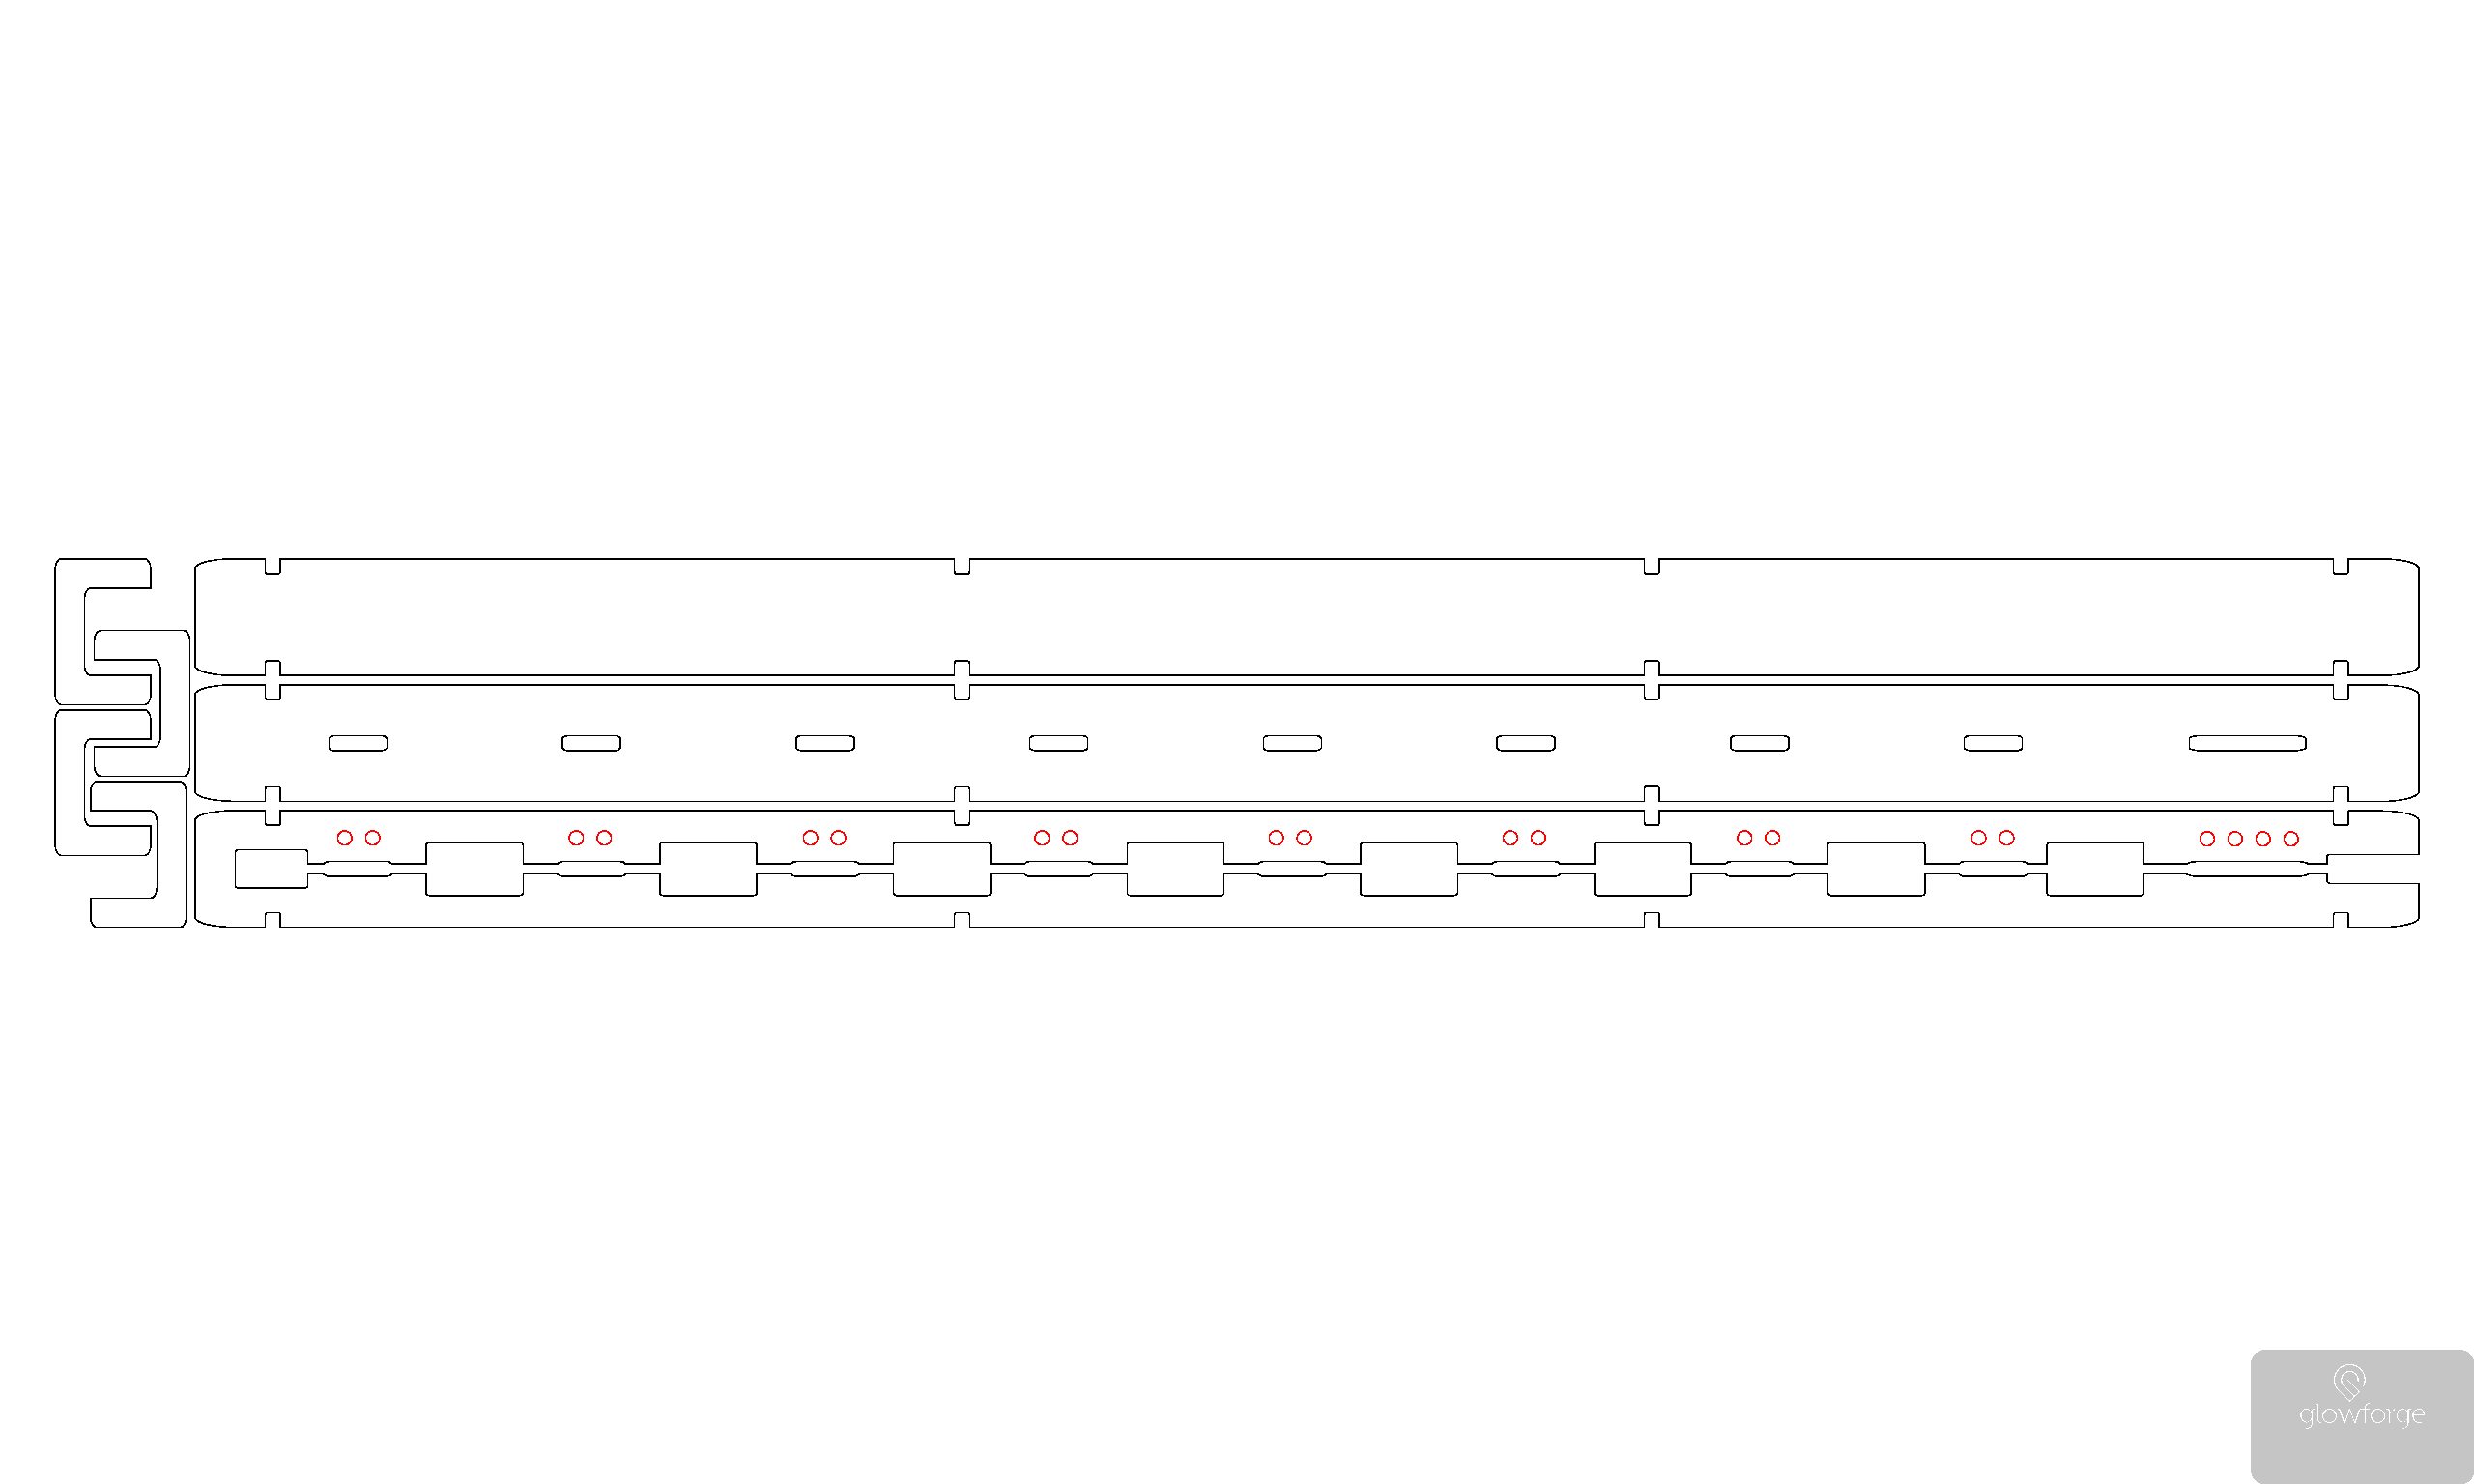
- Prepare to print the Solar System Base by first removing any Acrylic from the previous print from the Glowforge’s print bed and then inserting the Proofgrade Draftboard. Complete the printing process using the following steps:
- Click the Import Artwork button and select Upload to import the Solar System Base file.
- The red circles in the file should be set to Score, and black lines set to Cut.
- Print the wooden parts for the base, remove them from the Glowforge, and peel any protective paper from all wood pieces.
Section 2 – Use:
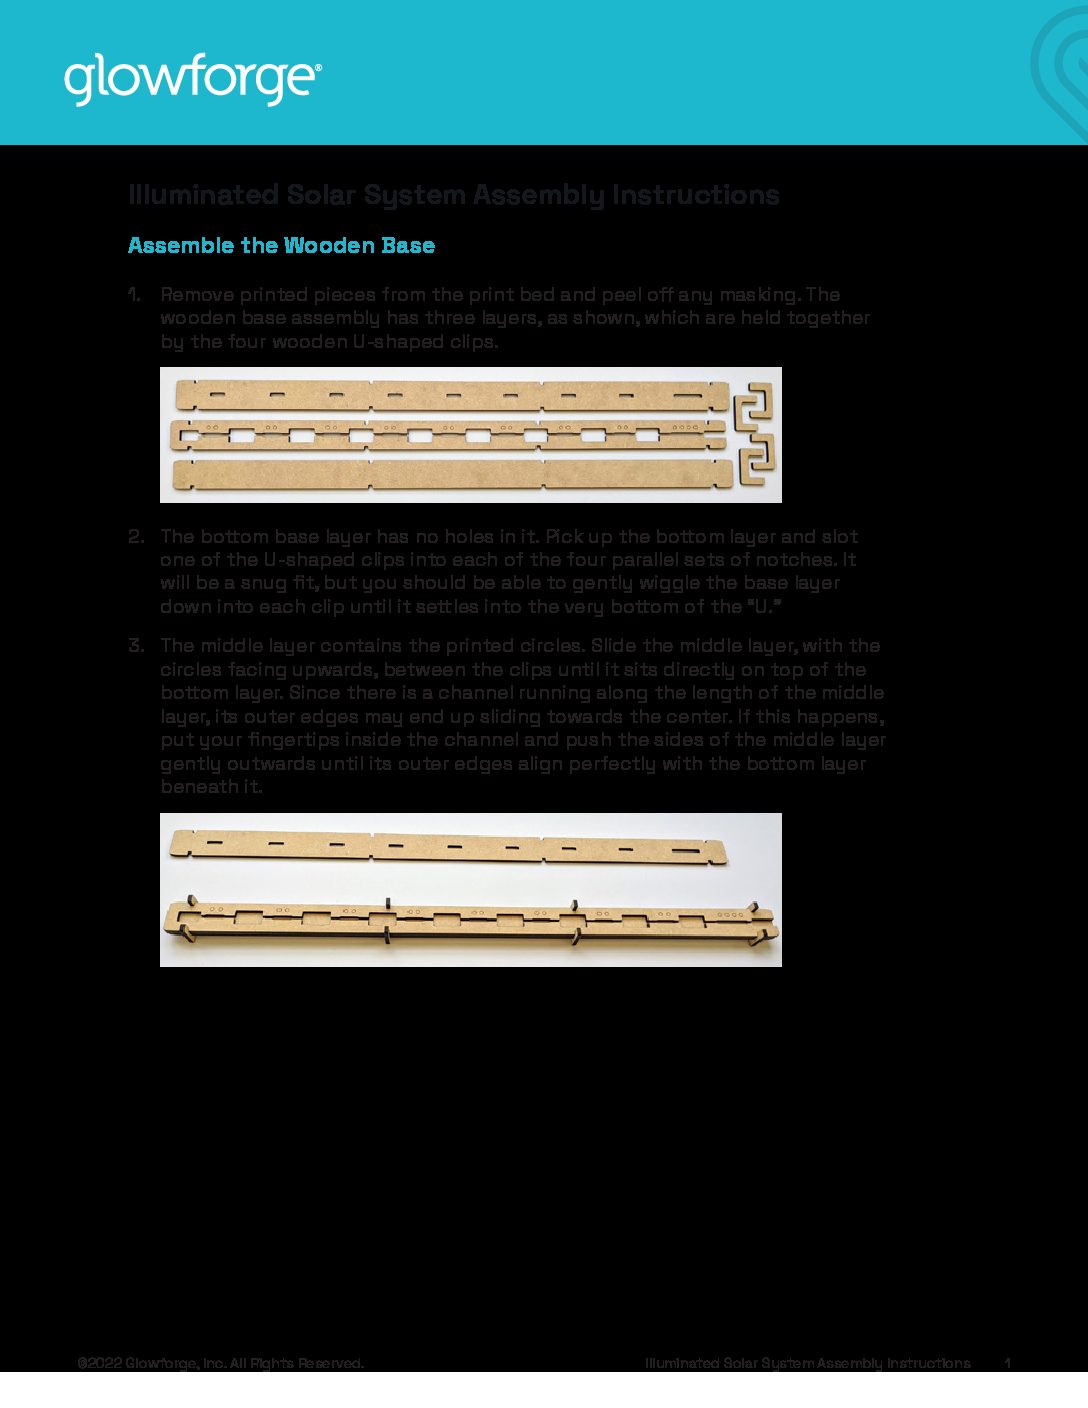
- Assemble the project by following the steps of the Illuminated Solar System Assembly Instructions.
- After assembling the Illuminated Solar System, add and arrange the printed Sun and planets.
- Give each group a chance to introduce their planet and some of the fun facts they learned.
- Display the Illuminated Solar System in a public place at school or in the community.
Reflection Questions:
- Were you able to answer your “I Wonder” question? Share your question and answers.
- What is the most fascinating thing you learned about our solar system by creating the Illuminated Solar System?
- What other ways could you represent your planet besides drawing its physical appearance?
Pro Tips:
- Use a Sharpie or other dark, black marker for drawing the planets.
- Edge lit effects look best when the etched image is on the back side of the Acrylic. This reverses the image when it is viewed from the front. For drawings to display exactly as they have been drawn, reverse the image before printing by selecting it and clicking the flip vertical button. If using text, it will also need to be reversed.
- Create prototypes prior to doing final prints using cardboard for test prints. Just remember that if the design uses joinery such as slots or finger joints, these may need to be adjusted to suit the prototyping materials.
- If students would like to make their display permanent, the planets can be glued into the slots in the base.
Reimagine:
- Design and draw your own, imaginary solar system that rotates around a faraway star. The star can be like the one in our solar system, or completely different. It could be a white dwarf or a neutron star. Create unique planets orbiting the star and then determine the characteristics of the planets based on size and distance from the star. You can explore whether smaller or larger planets are more likely to have an atmosphere with clouds, and whether some of their planets might have rings or moons.
- How does the distance to the sun impact the planets? Rearrange the planets in the Illuminated Solar System, and predict how the properties of each planet might change as a result. For example, how would Mercury be different if it swapped positions with Neptune? What would life on Earth be like if it were much closer to the sun? Much further away? Use the NASA Science for Kids and Passport to Space resources to help.
Meet Glowforge
The magical 3D laser printer that made this lesson possible. Learn more!
