
Grade Level
6, 7, 8, 9, 10, 11, and 12
Difficulty
Intermediate
Duration
1 hour 30 minutes
Subjects
Design & technology
Engineering
Entrepreneurship
STEAM
Technology
-
Students use a variety of technologies within a design process to identify and solve problems by creating new, useful or imaginative solutions.
-
Students develop and employ strategies for understanding and solving problems in ways that leverage the power of technological methods to develop and test solutions.
-
– Asking Questions and Defining Problems
– Developing and Using Models
– Planning and Carrying Out Investigations
– Analyzing and Interpreting Data
– Using Mathematics and Computational Thinking
– Constructing Explanations and Designing Solutions
– Engaging in Argument from Evidence
– Obtaining, Evaluating, and Communicating Information
Vocab
Reuse
Repurpose
Recycle
Repair
Prototype
Author
Glowforge
Licensing
Lesson for Download
Overview
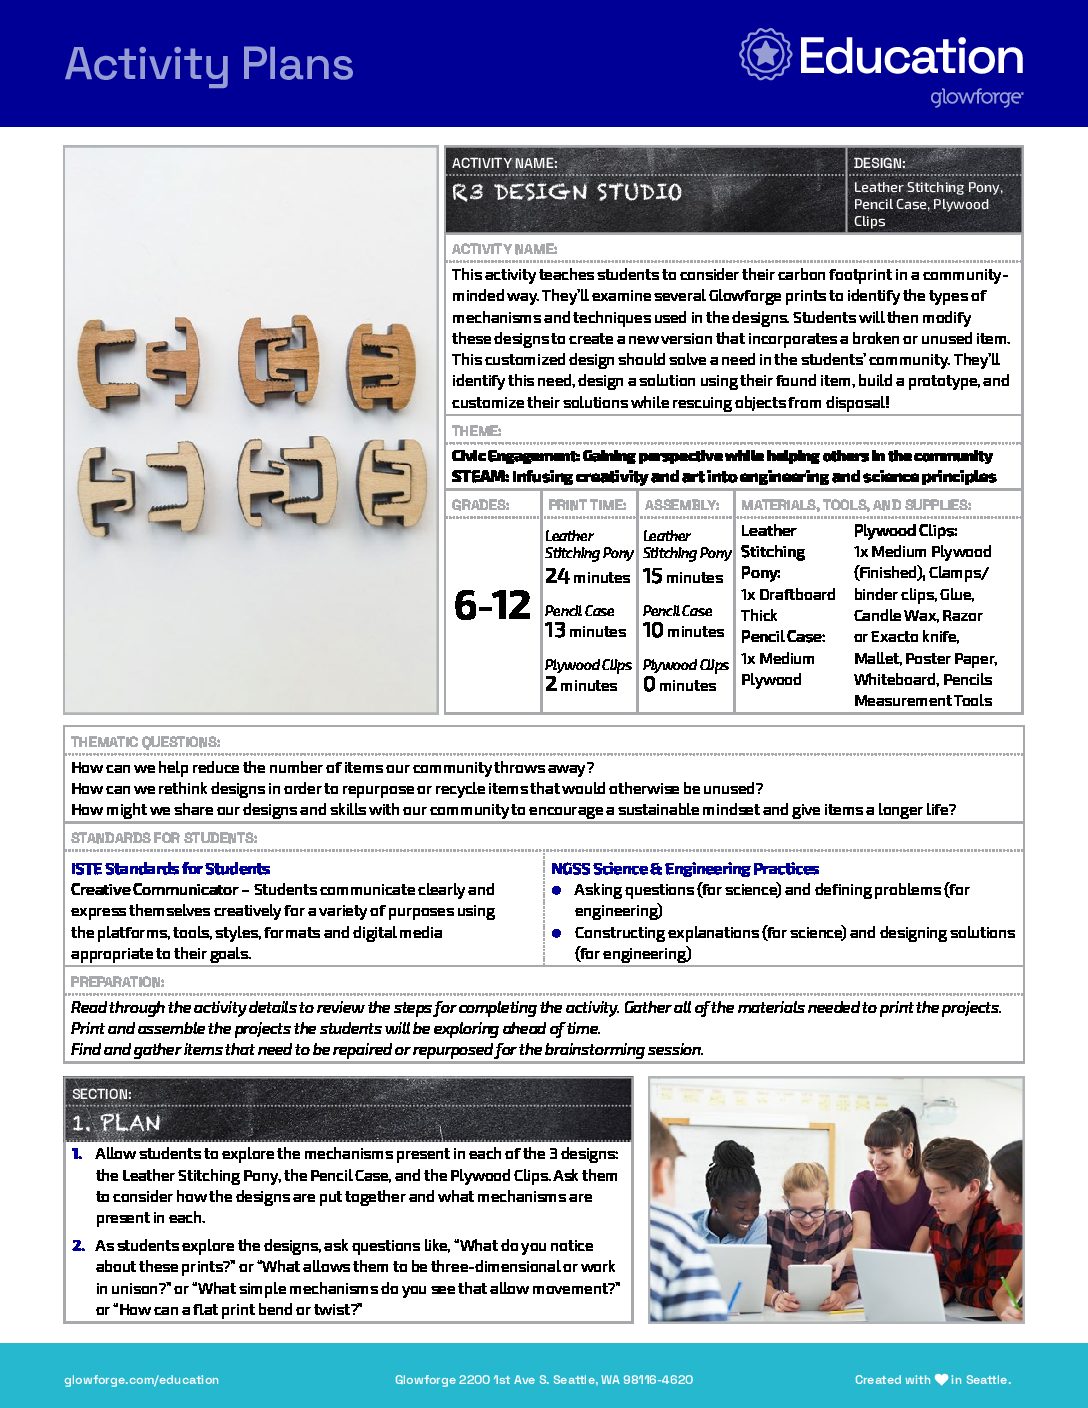
This activity teaches students to consider their carbon footprint in a community-minded way. They’ll examine several Glowforge prints to identify the types of mechanisms and techniques used in the designs. Students will then modify these designs to create a new version that incorporates a broken or unused item. This customized design should solve a need in the students’ community. They’ll identify this need, design a solution using their found item, build a prototype, and customize their solutions while rescuing objects from disposal!
Objective
Students will…Thematic Questions:
Outcomes:
Standards:
ISTE Standards for Students
NGSS Science & Engineering Practices
Supplies
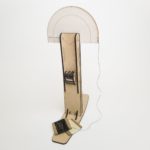
- Leather Stitching Pony – 1x thick Draftboard (Unfinished)
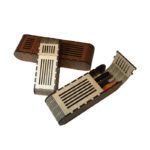
- Pencil Case – 1x Medium Plywood
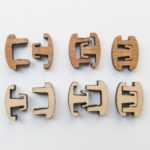
- Plywood Clips – 1x Medium Plywood (Finished) – these are small, so scraps would work well here
- Clamps or binder clips
- Glue
- Candle wax or similar to reduce the friction between the clamp handle and the stitching pony.
- Razor or Exacto knife
- Mallet
- Poster paper
- Whiteboard
- Pencils
- Measurement tools (i.e., rulers, protractors, quick square)
Students’ final print designs will require more Proofgrade materials based on their design and the type of material needed. A list of additional materials should be defined and collected after Step 9 in Section 2.
Catalog Designs
Description
Lesson Outline:
Get Ready:
- Read through the activity details to review the steps for completing the activity. Gather all of the materials needed to print the projects.
- Print and assemble the projects the students will be exploring ahead of time.
- Find and gather items that need to be repaired or repurposed for the brainstorming session.
Production Time:
- Leather Stitching Pony – 24 minutes
- Pencil Case – 13 minutes
- Plywood Clips – 2 minutes
Assemble
- Leather Stitching Pony -15 minutes
- Pencil Case – 10 minutes
- Plywood Clips – 0 minutes
Rubric:
Use this optional rubric for student self-reflection or formative feedback throughout the R3Design Studio experience. 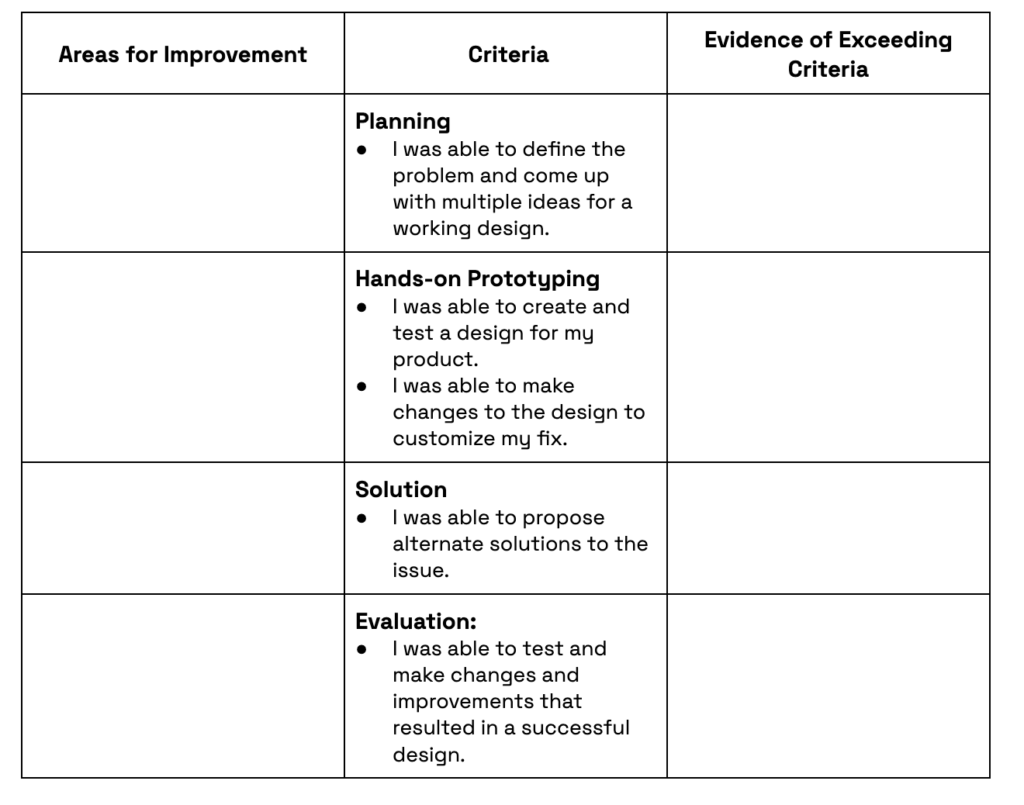
Lesson Instructions
Section 1 – Plan:
- Allow students to explore the mechanisms present in each of the 3 designs: the Leather Stitching Pony, the Pencil Case, and the Plywood Clips. Ask them to consider how the designs are put together and what mechanisms are present in each.
- As students explore the designs, ask questions like, “What do you notice about these prints?” or “What allows them to be three-dimensional or work in unison?” or “What simple mechanisms do you see that allow movement?” or “How can a flat print bend or twist?”
- Ask students to identify an object in their classroom, school, or homes, that could either be repaired or repurposed. An example could be that the doorstop in the music room is too small to fit under the door – it could be repaired to fit properly?”
- Define the issue and the user’s needs in an actionable problem statement using a simple format like: (User) needs (object) because (insight). The completed statement might look like: First graders need a storage solution for headphones because they spend too much class time untangling the wires after taking them out of the drawer.
- Create a “How Might We…” guiding question, such as:
- How might we repair this item?
- How might we make this item more accessible to…?
- How might we create a ‘better than new’ replacement part?
- Brainstorm how to use the mechanisms in the 3 designs listed above to fix or repurpose the broken or unused item. This can be done individually or in small groups using poster paper or a whiteboard to collect all of the ideas. Remind students that no idea is a bad idea!
- Once the brainstorming is completed, allow time for students to share their ideas with the larger group.
- After each group shares, have students use the question stems below to help consider how each group might innovate or improve a design.
- How would it be different if…?
- What would change if…?
- What other way could we…?
- Next, have the students consider their problem statement, their own ideas, and others’ feedback, and design prototypes that modify the catalog designs in a way that repairs or repurposes their chosen item. Prototypes can be drawn with paper and pencil, a shared whiteboard or poster paper, or created in design software. Students should make a note here about which Glowforge design has the mechanism they want to utilize in their own design. Remind students that they can explore the printed Glowforge designs again if they need to.
- Encourage students to use rulers and protractors to measure the actual specifications needed for their design. Students should make a note of the measurements on their prototype design drawing for the customization part of the project. Accurate measurements will be critical for making changes in the Glowforge app in Section 2.
Section 2 – Customize and Create:
- Have students open their design project in the Glowforge App: either the Leather Stitching Pony, Pencil Case, or Plywood Clips.
- Have students take a few minutes to look at each assembly piece of the print and consider which parts of each design are essential.
- Students should start customizing the design by identifying the pieces they need for their custom design and if they need to omit any pieces using the Ignore option in the Glowforge app.
- Once the students have identified the essential parts of the design, they should adjust any of the pieces as required by their design prototype (i.e., measurements, adjustment to size, placement, or duplicate parts).
- If students are using design software, have them export the file from the Glowforge App using the ‘Export Design’ option in the 3 dots menu. Make adjustments to the file as needed and when the design is ready to print, import the design file back into the Glowforge app using the (+) and upload option. To upload the file back to Glowforge, the students should save it as a PDF or SVG.
- Now students are ready to test and print their customized prototype. Consider using cardboard for test prints.
- Just remember that if the prototype designs use joinery such as slots or finger joints, these may need to be adjusted to suit their prototyping materials.
- When choosing test materials, make sure to use materials that are laser safe. You can learn more about what materials are compatible with Glowforge here.
- Have students assemble their prototypes and test them for fit, durability, and functionality. Students may find flaws in their designs during this process. They should make notes and record changes to their prototype design as necessary.
- Pair students with a partner or small group for feedback sessions. Discuss changes that could improve the custom design.
- After the feedback sessions, and after identifying the needed changes to their designs, students will make the adjustments to their designs in the Glowforge app, or their preferred design software. They will repeat steps 4-7 until their cardboard design prototype functions as planned. **
- Print the finalized design in the appropriate material.
Section 3 – Use:
Students should…
- Apply the final design to the item being repaired, repurposed, or recycled.
- Document the customized design file, directions, materials used, and images of the design to use for future reference. These items can be curated in a library of designs in a folder, spreadsheet, or another organizational tool for future R3design Studio events, design challenges, or user inspiration.
Reflection Questions:
Help students consider…
- What inspired the customizations they added to the original designs?
- What have you learned from this process and what might you do differently next time?
- How can you incorporate the skills you used in this activity to create your own custom designs for the Glowforge?
Pro Tips:
- Have students assemble the Glowforge prints in the planning stage so they can better understand the designs and how each of the mechanisms work.
- Consider other designs available in the Glowforge Design Catalog that can be used to demonstrate an additional mechanism not included in this activity.
- During the design phase, keep a checklist of adjustments for the Glowforge design to make sure you’ve completed all the necessary adjustments before printing.

Reimagine:
- How might you adapt one of the supplied designs (Leather Stitching Pony, Pencil Case, or Plywood Clips) to be used in another area of the school? Consider the media center, a classroom, or even a locker.
Remix:
Have students…
- Work in teams to compete to design the best solution in a “repair, repurpose, recycle challenge.” Invite a panel of community members to pick the best solution. Award a prize to the winning team.
- Host a Repair Cafe for the community. As students become more adept at designing solutions, invite members of the community to bring in items that are unused or broken for repair or repurpose. Using the principles of the design process, students will fix items brought in creating a culture of sustainability.
Meet Glowforge
The magical 3D laser printer that made this lesson possible. Learn more!
